Select a file to view it.
![]()
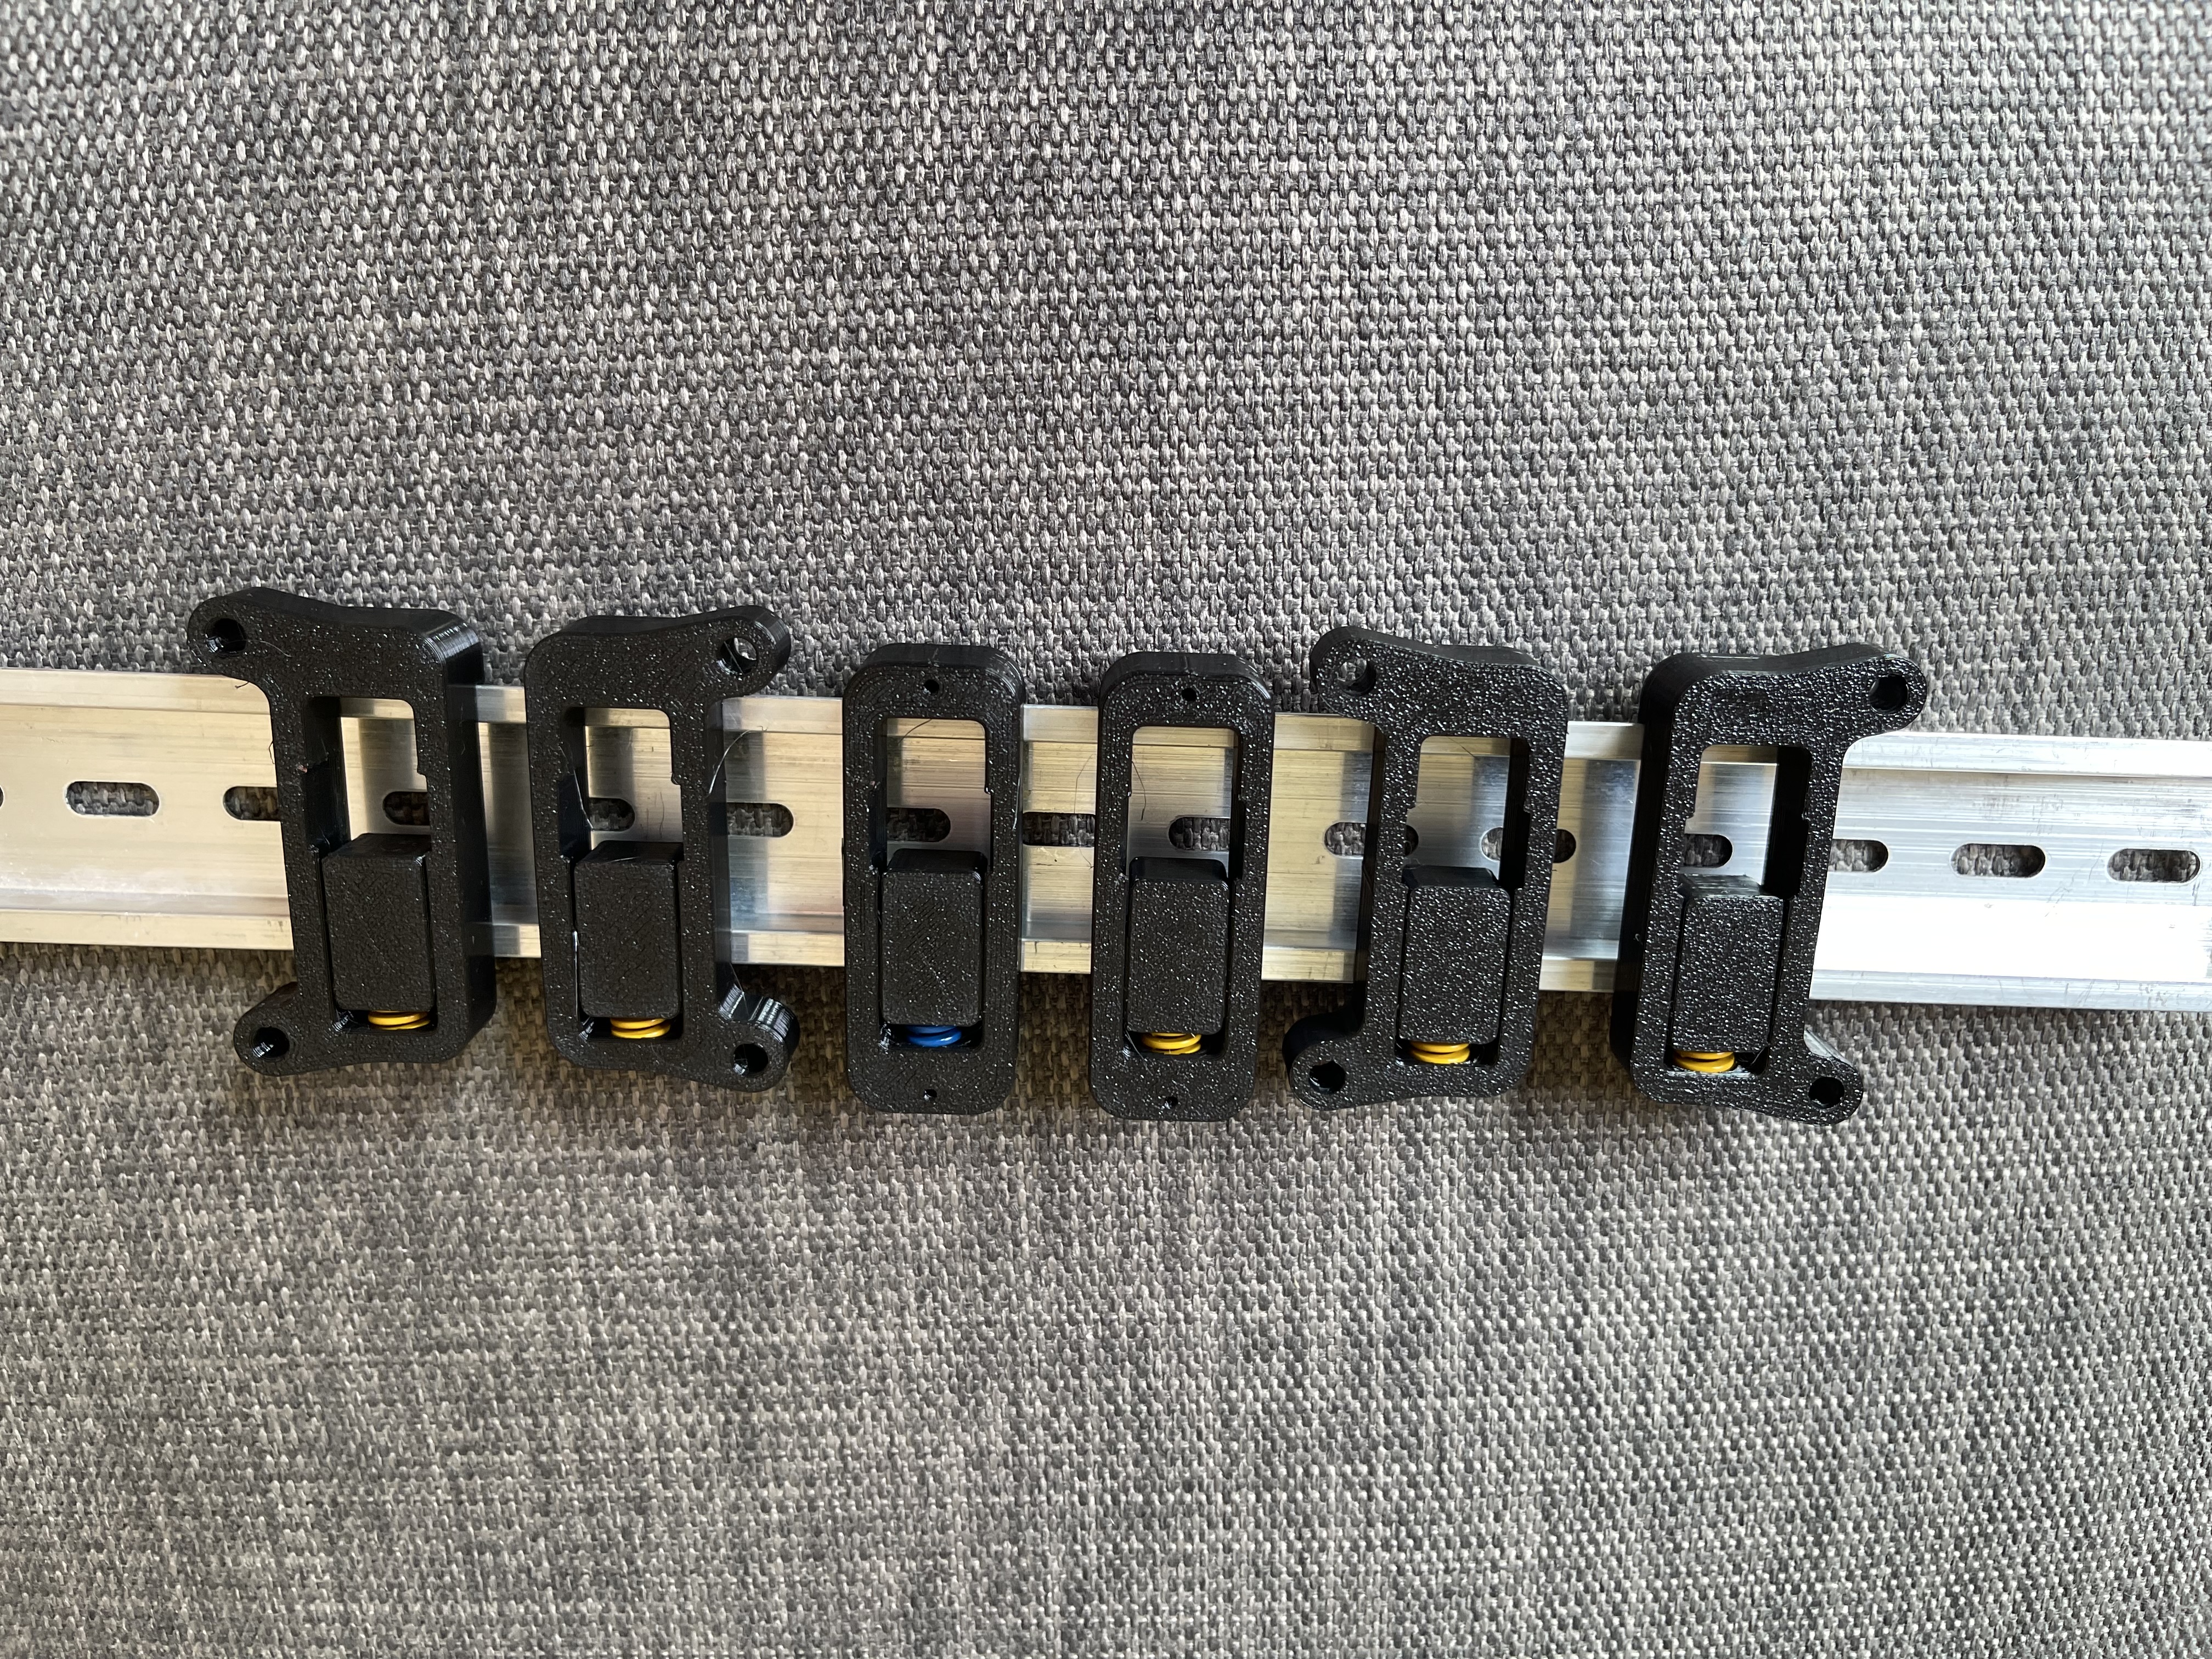
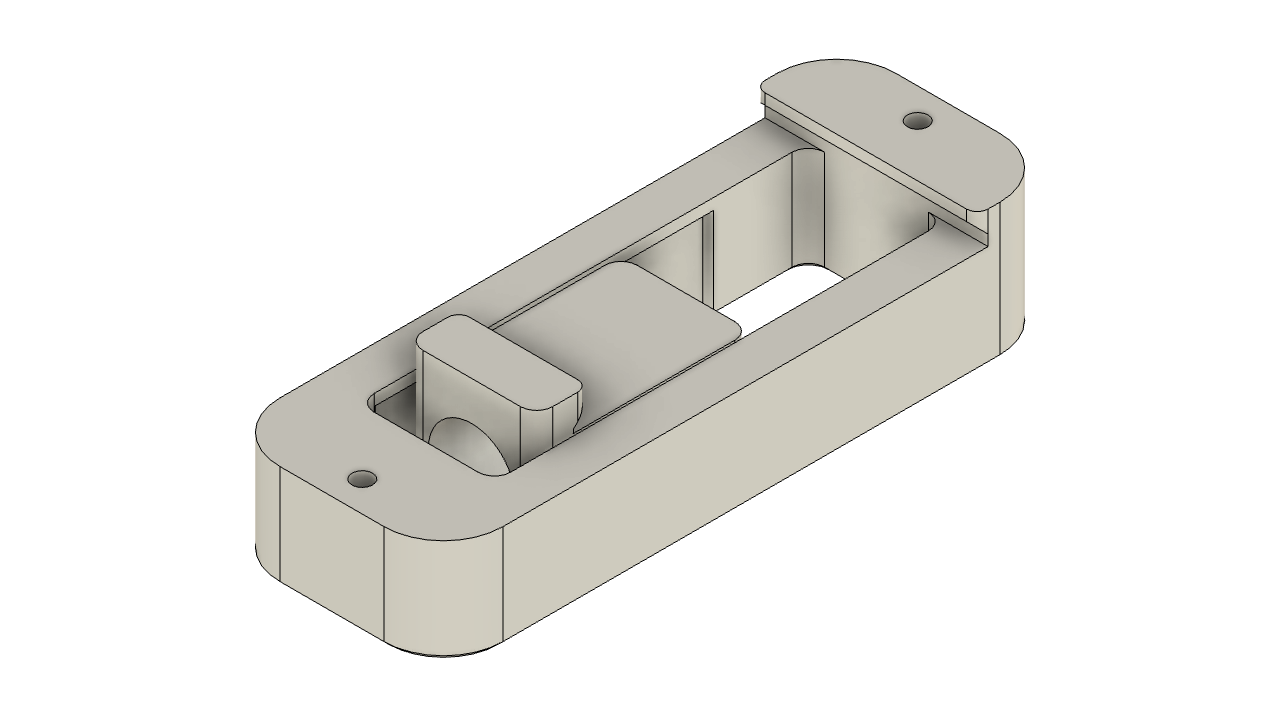
I made these Din clips to replace the Voron "print in place" clips. I had issues, no matter the print settings and/or material, with the items staying in place. These clips are two parts, the main clip and moving shuttle. The only additional piece is the spring. I used yellow and blue bed springs and it clips everything very tight, but still able to remove.
I would not recommend that you use brown/red or other heavier bed springs since it applies too much pressure.
Standard Voron print settings should work well, 0.4mm nozzle with 0.2mm layer height. PETG or ABS recommended.
You will need to print two pieces for one clip.
| Filename | Use |
|---|---|
| BEEFY_Din-PSU(50mm)-mirrored.stl | 24v PSU (mirrored) M4 screws |
| BEEFY_Din-PSU(50mm).stl | 24v PSU M4 screws |
| BEEFY_Din(55mm).stl | 5v PSU M3 screws |
| BEEFY_Din-shuttle.stl | Moving shuttle for all models |
| BEEFY_Din(standard).stl | Used for Pi and other controllers |
Assemble before installation. Insert spring into shuttle and slide into the groves in the underside of the main body. The holes may need to be drilled out a little to fit.
.png)
.png)
This is the spring kit I used. Again I'd stick to the blue or yellow springs for the best result. https://www.amazon.com/gp/product/B081DSZTV6