Select a file to view it.

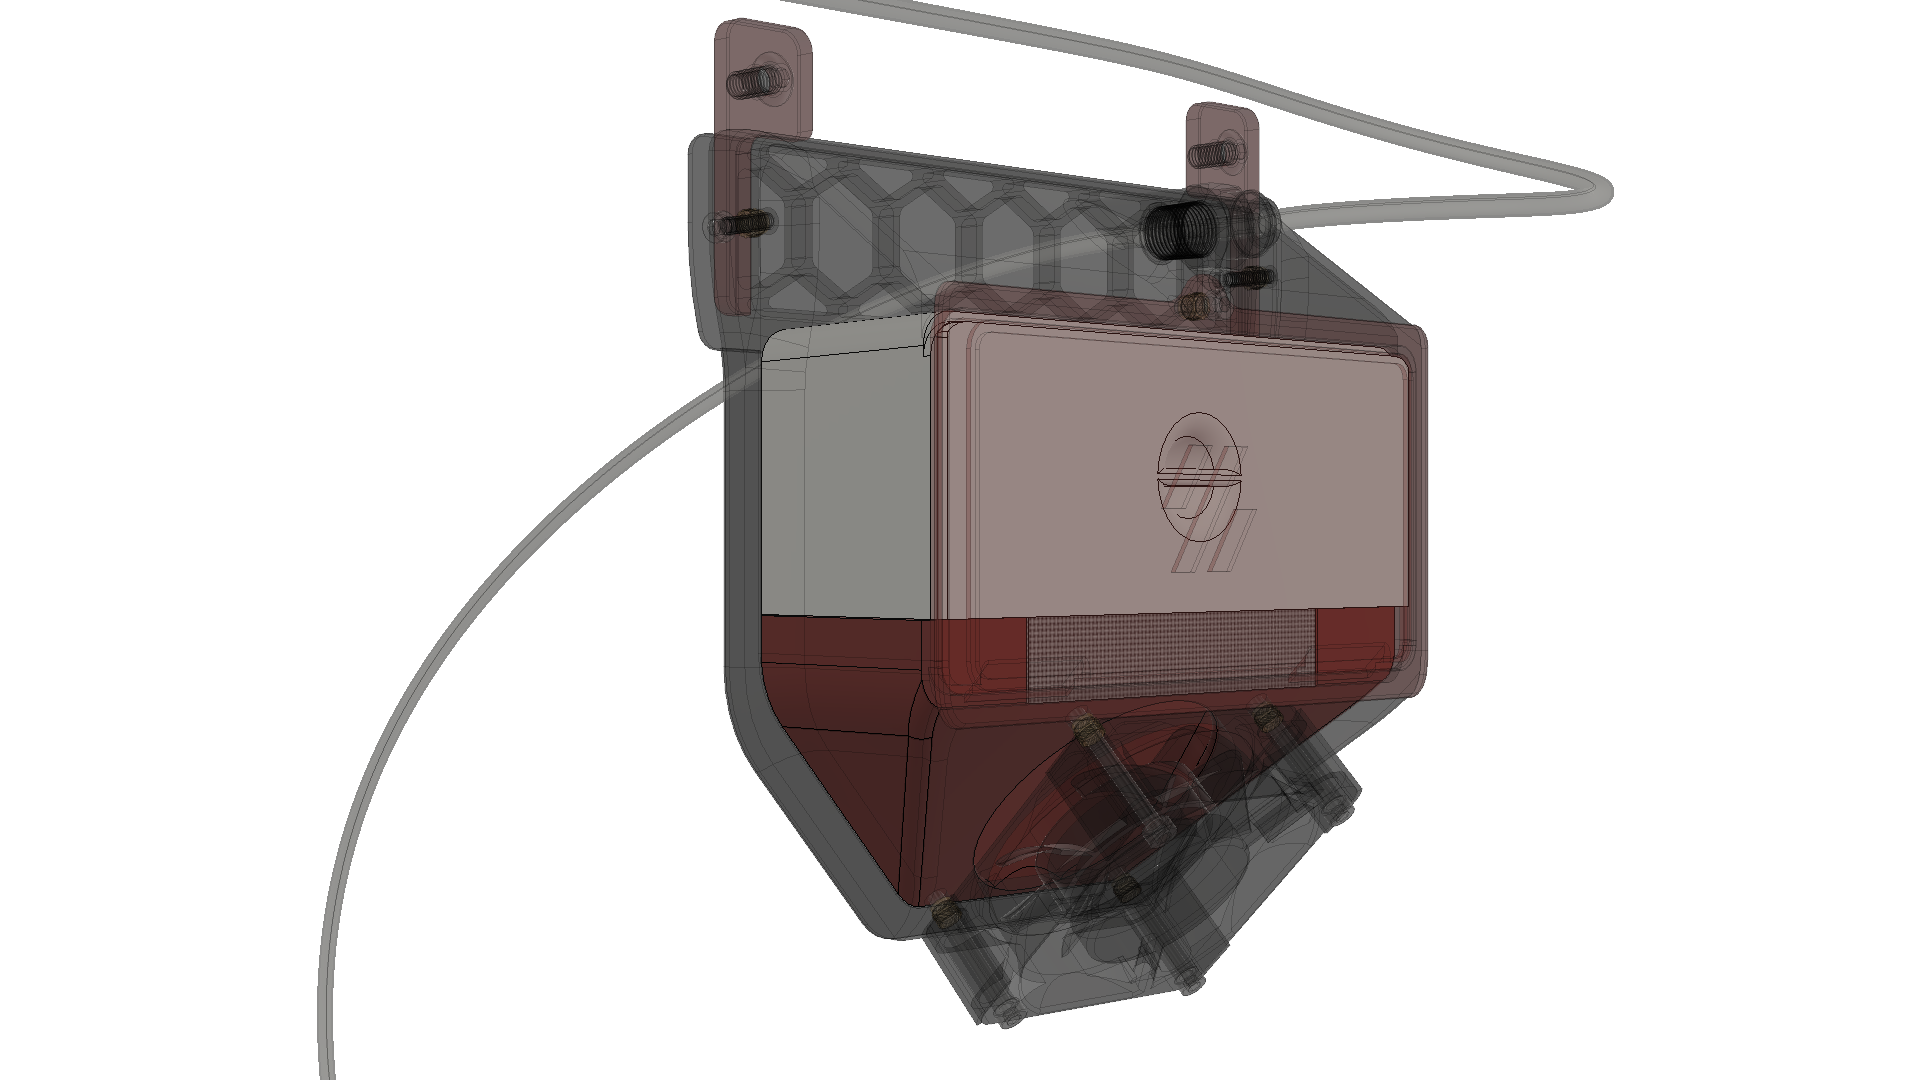
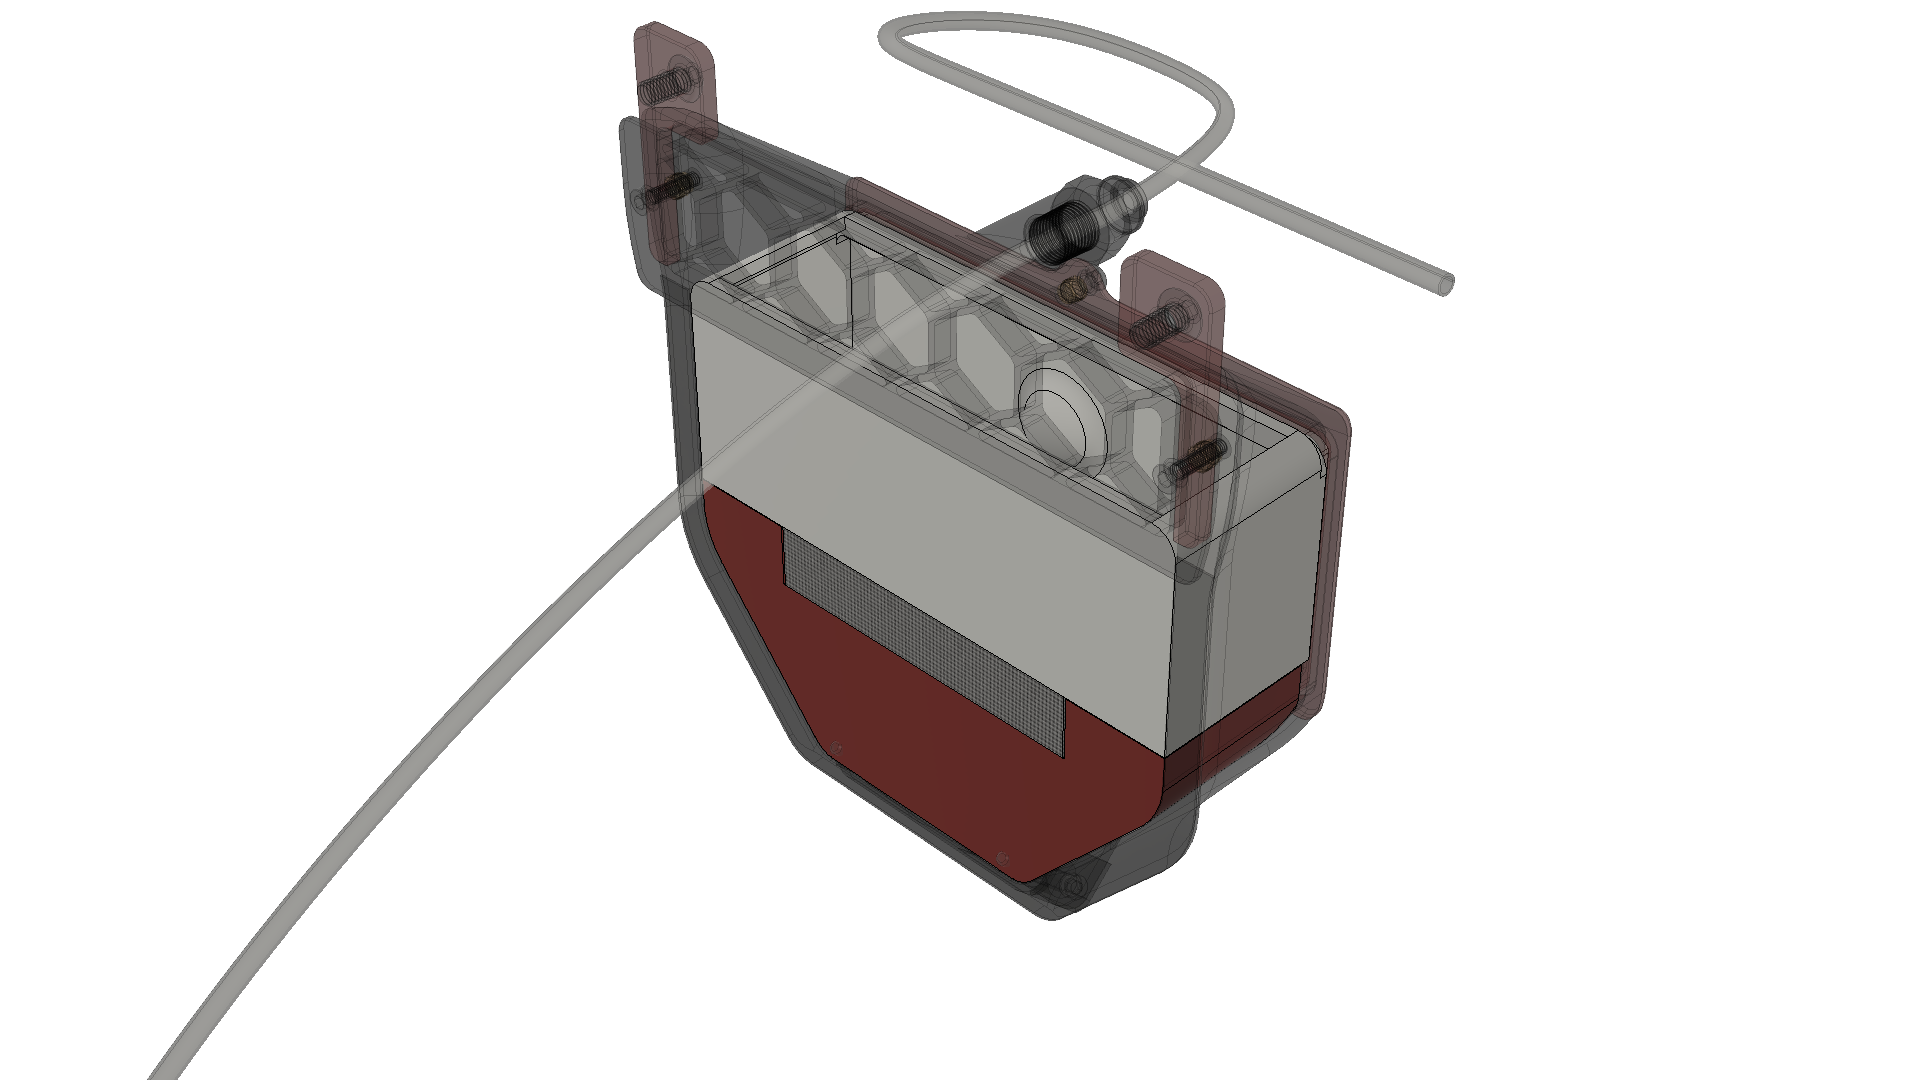
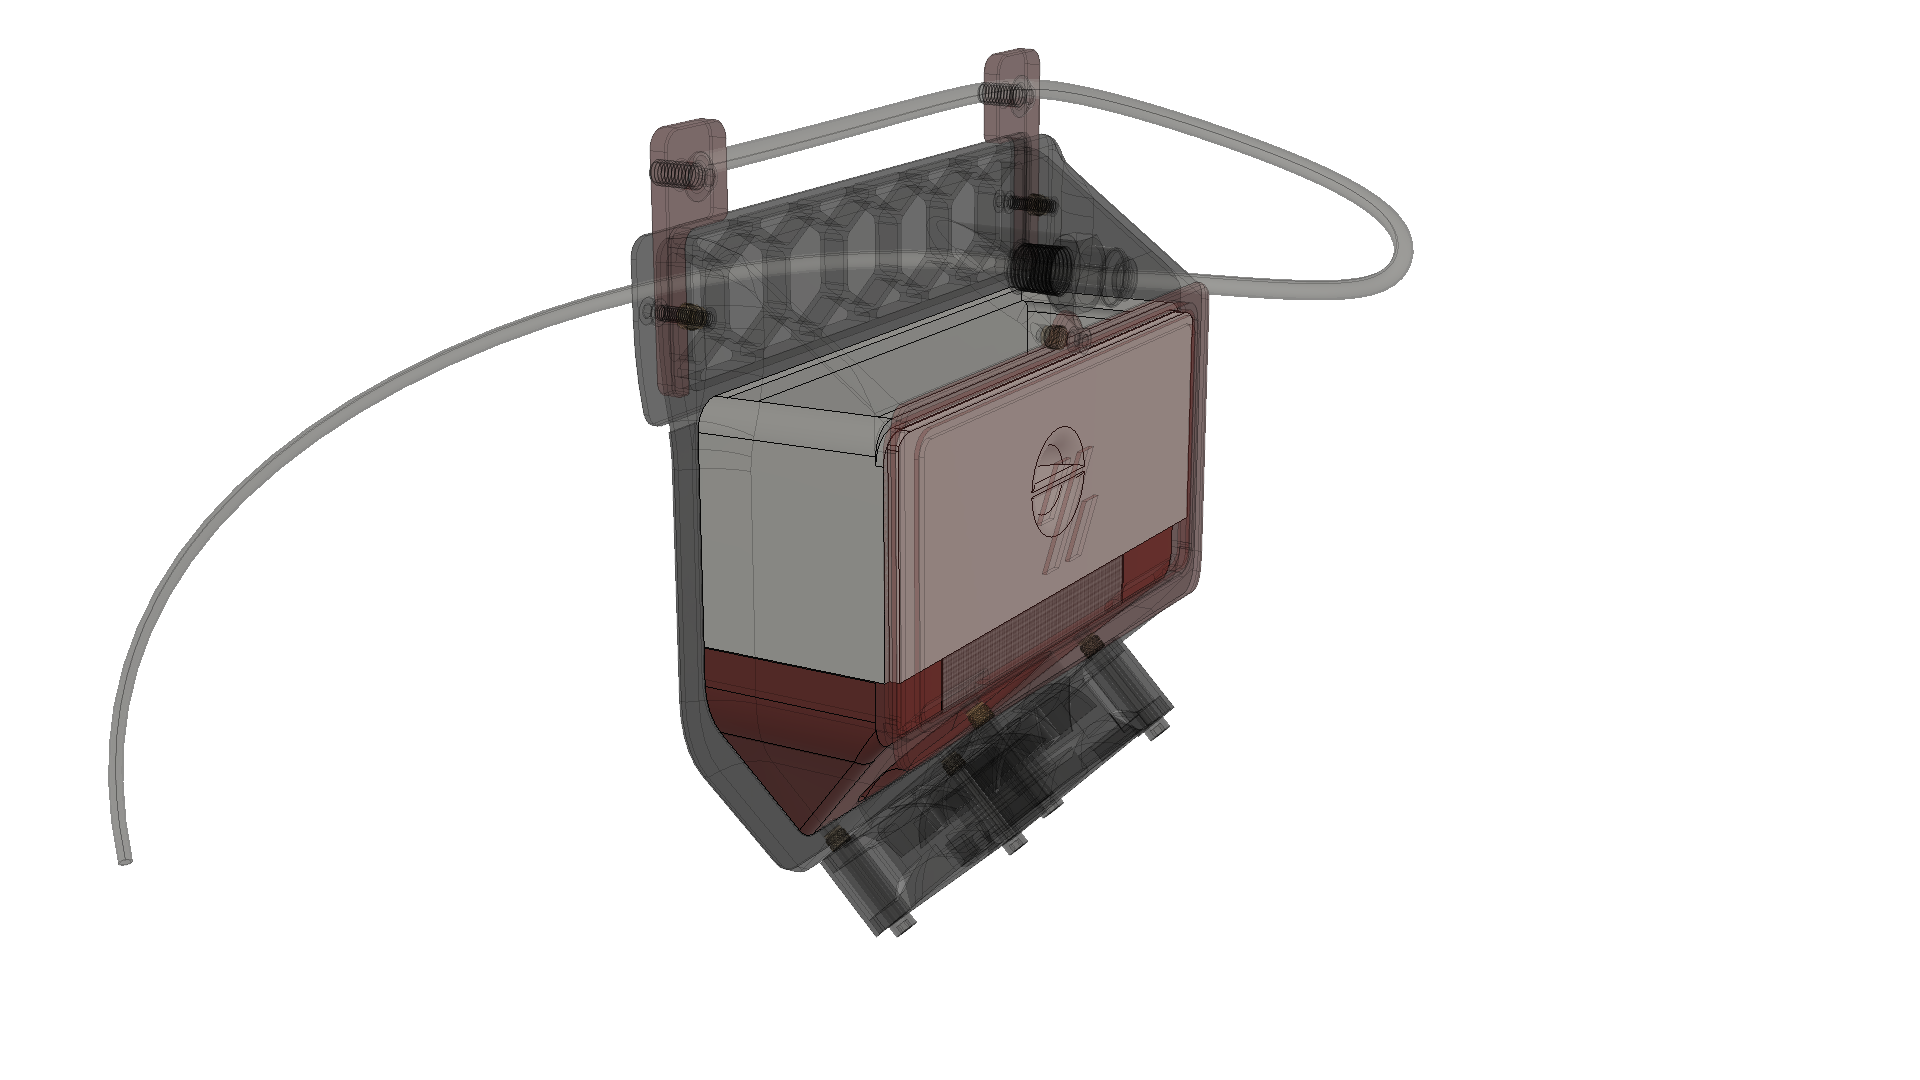
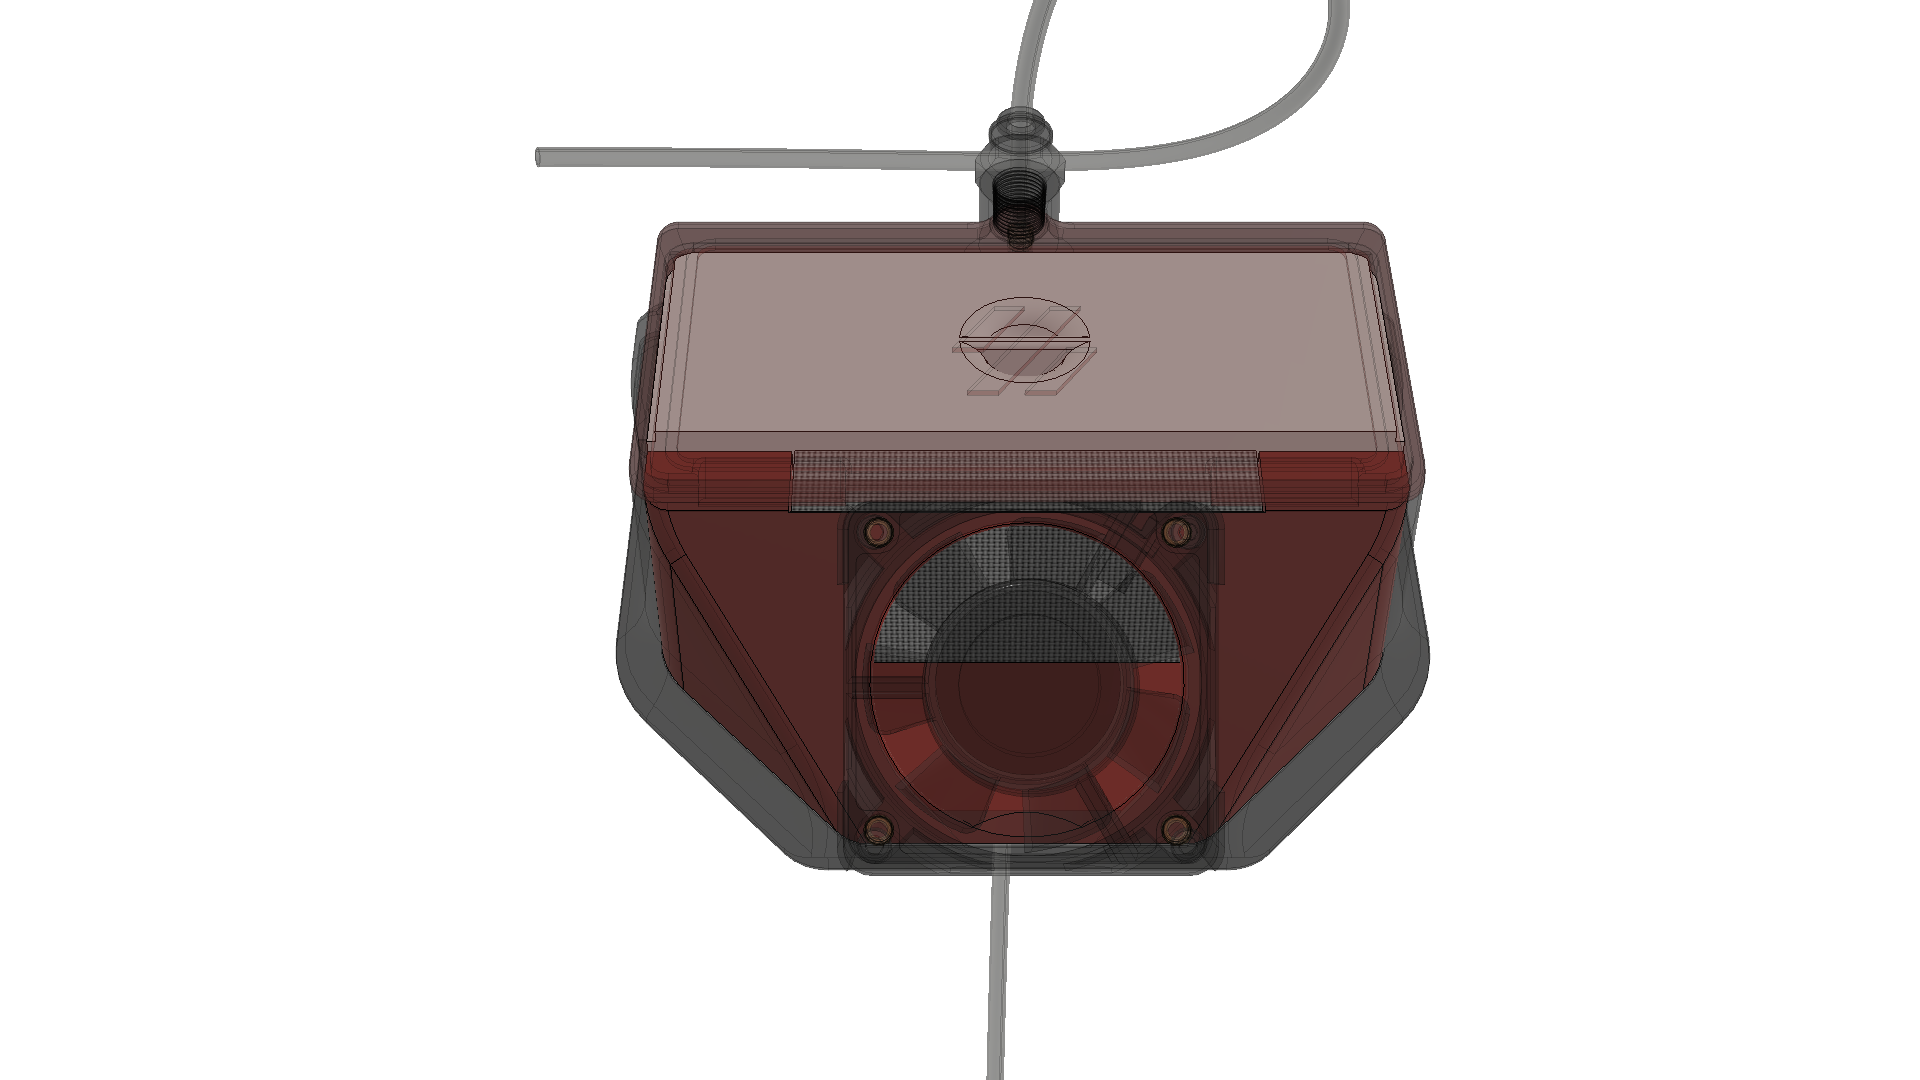
Since the printer produces many small particles, the goal is to filter out as many of them as possible. A few months ago my friend Deutherius had the idea to equip the original exhaust fan with activated coal and a Hepa filter, so I designed these filter inserts. The activated coal removes e.g. the smell of ABS and the Hepa filter catches most of the small particles.
The air first blows through activated coal particles and then through the Hepa filter. This still doesn't remove all particles, but it is better than nothing. This mod is fully compatible with the stock exhaust fan housing, except original M3x30mm screws that hold the fan are too long and need to be replaced with M3x25mm. The filter materials can be removed and replaced very easily via the original cover.
You just need to print the two inserts for the housing. There are two versions for the activated coal insert: One with a modeled-in mesh and one without. The insert without mesh is for creating your own mesh by using the infill. You need a custom mesh if you use particles smaller than 0.8 mm.
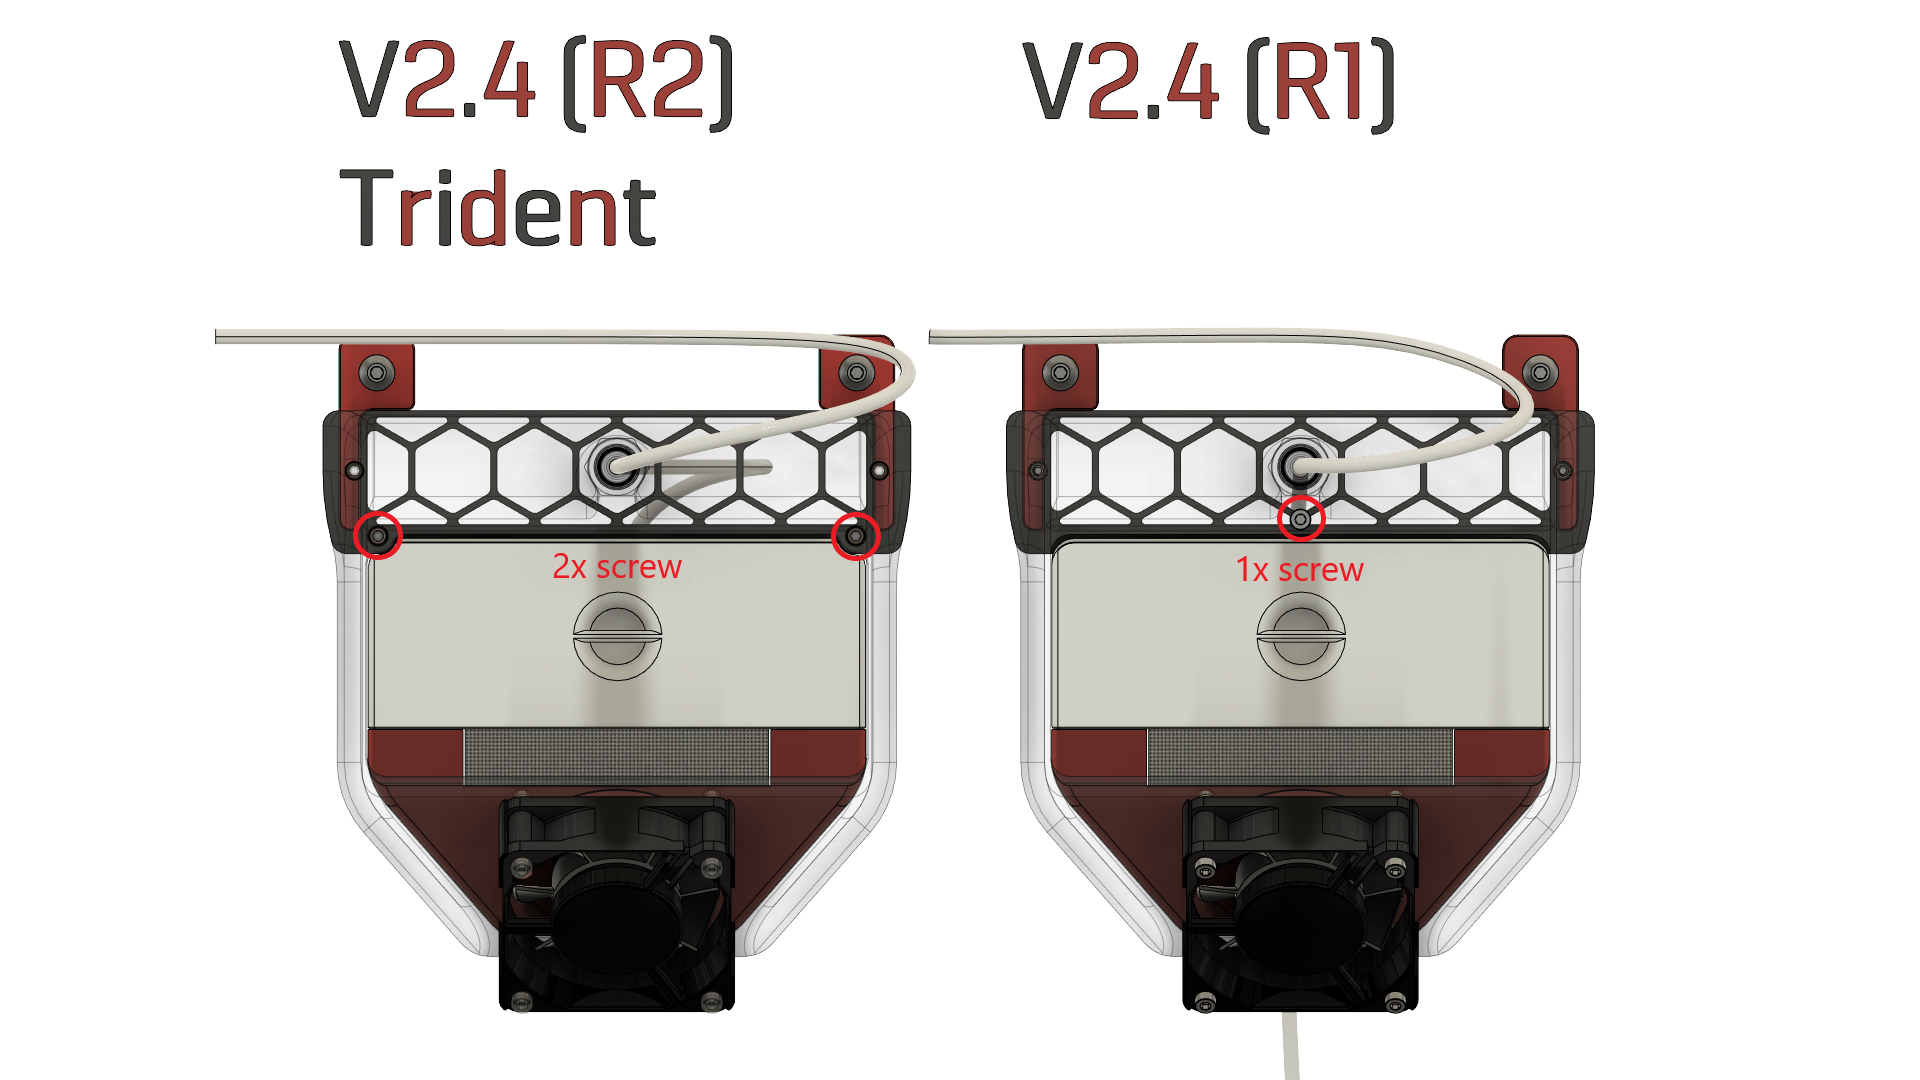
You also have to choose between V2.4(R1) and V2.4(R2)/Trident.
| 1: with modeled mesh | 2: with custom mesh |
|---|---|
| 1x 1_hepa.stl | 1x 1_hepa.stl |
| 1x 1_lid.stl | 1x 1_lid.stl |
| 1x 1_coal_with_mesh.stl | 1x 1_coal_for_infill_mesh.stl |
| / | 1x 0_filterdummy_dont_print.stl (as modifier) |
There are two ways to create a custom mesh:
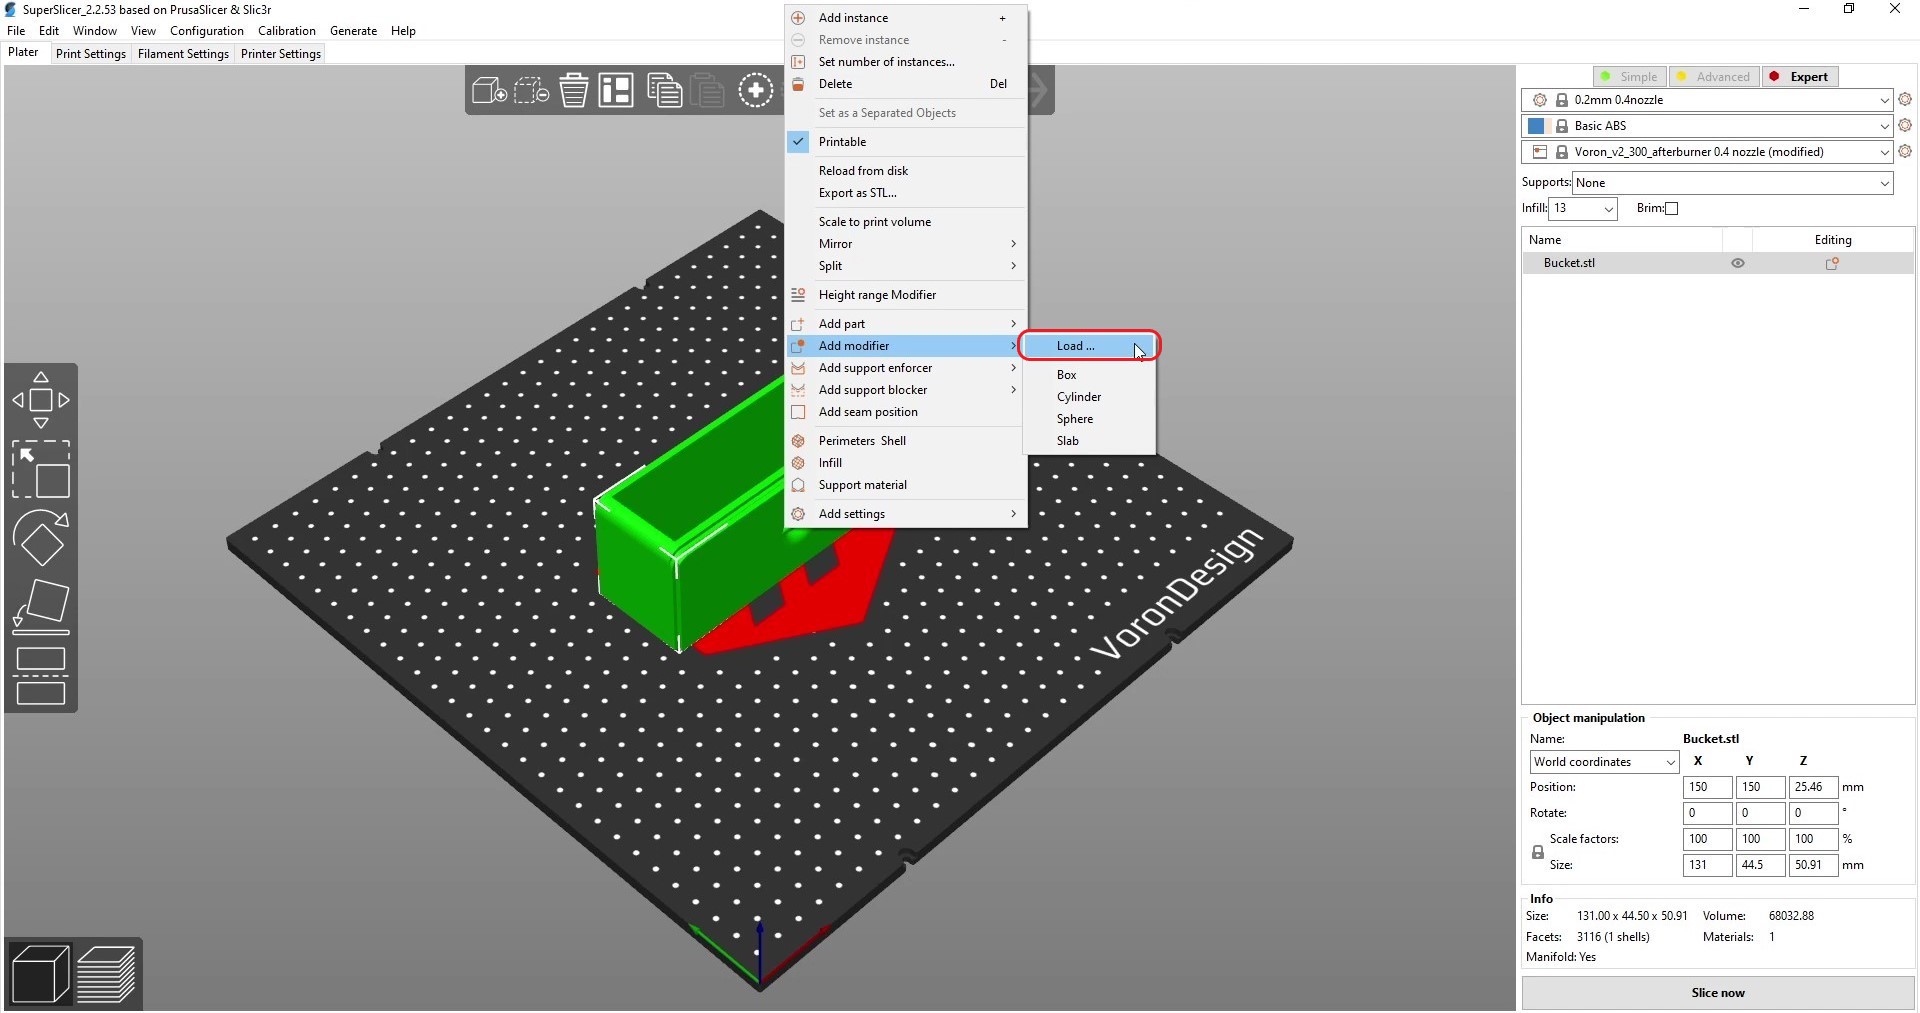
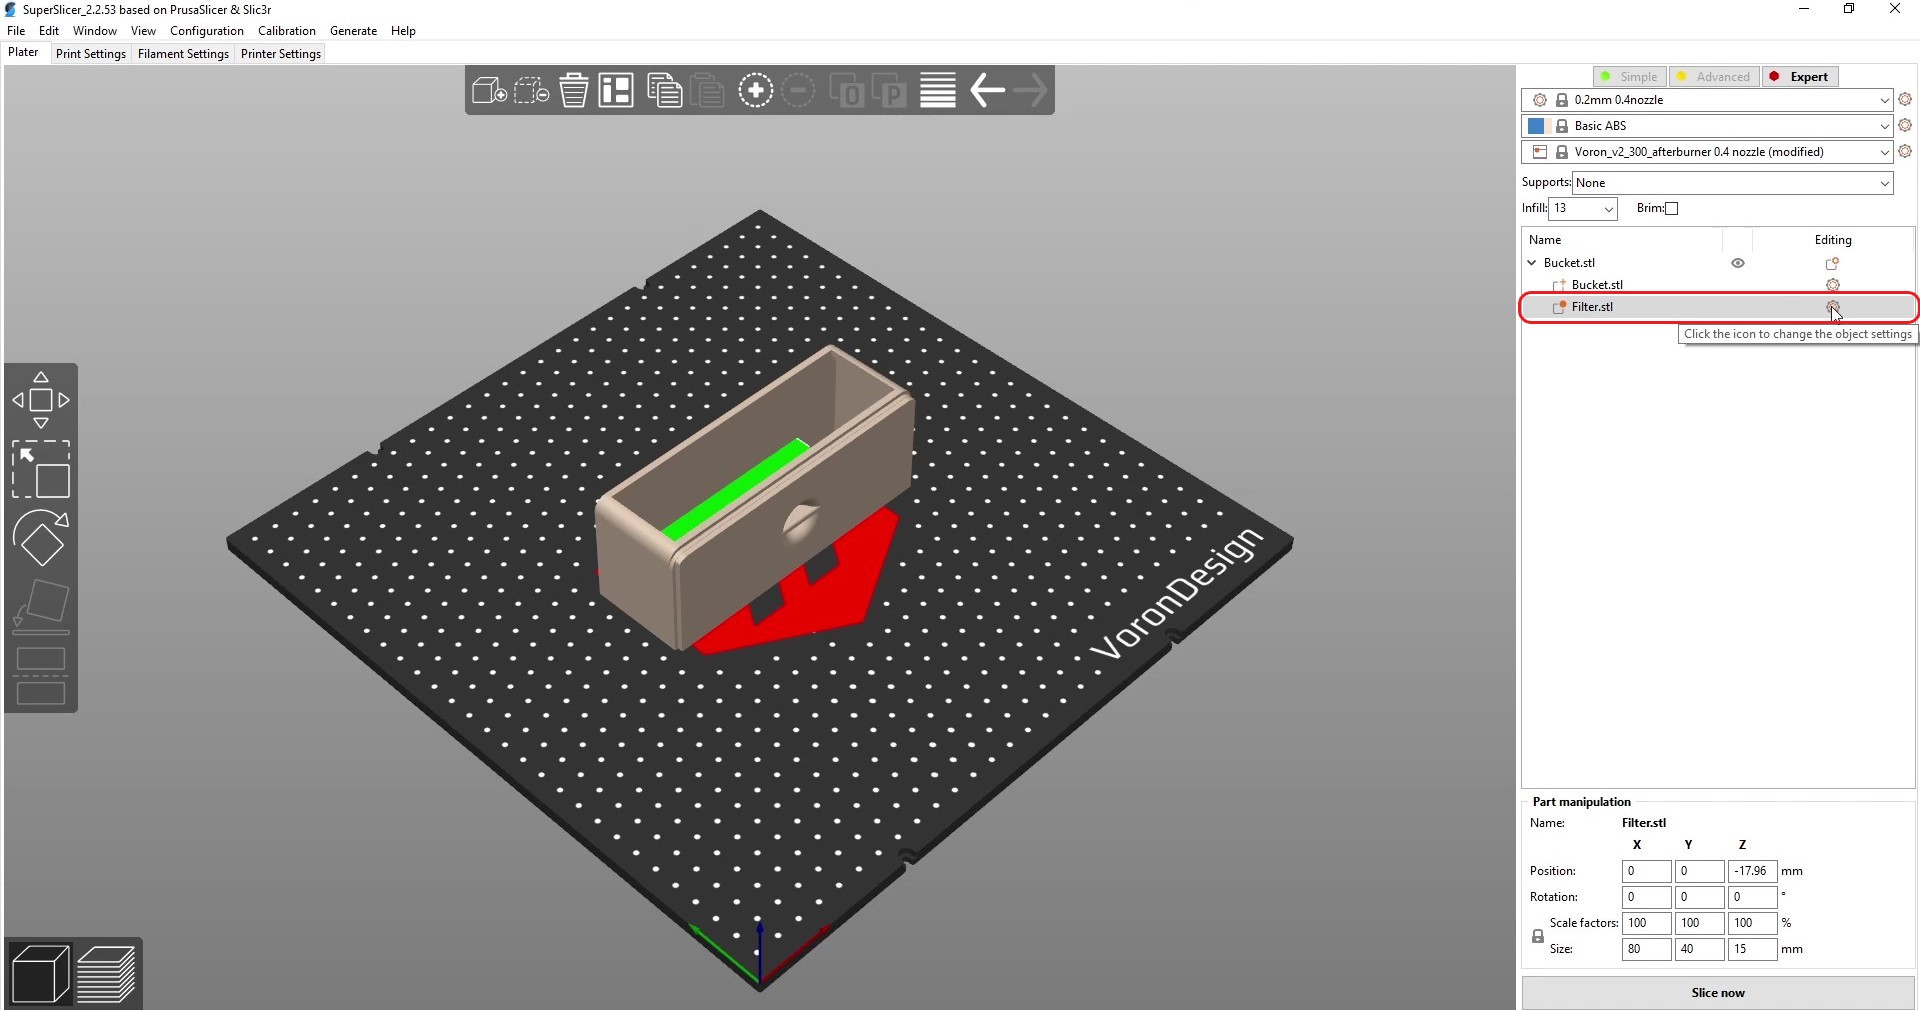
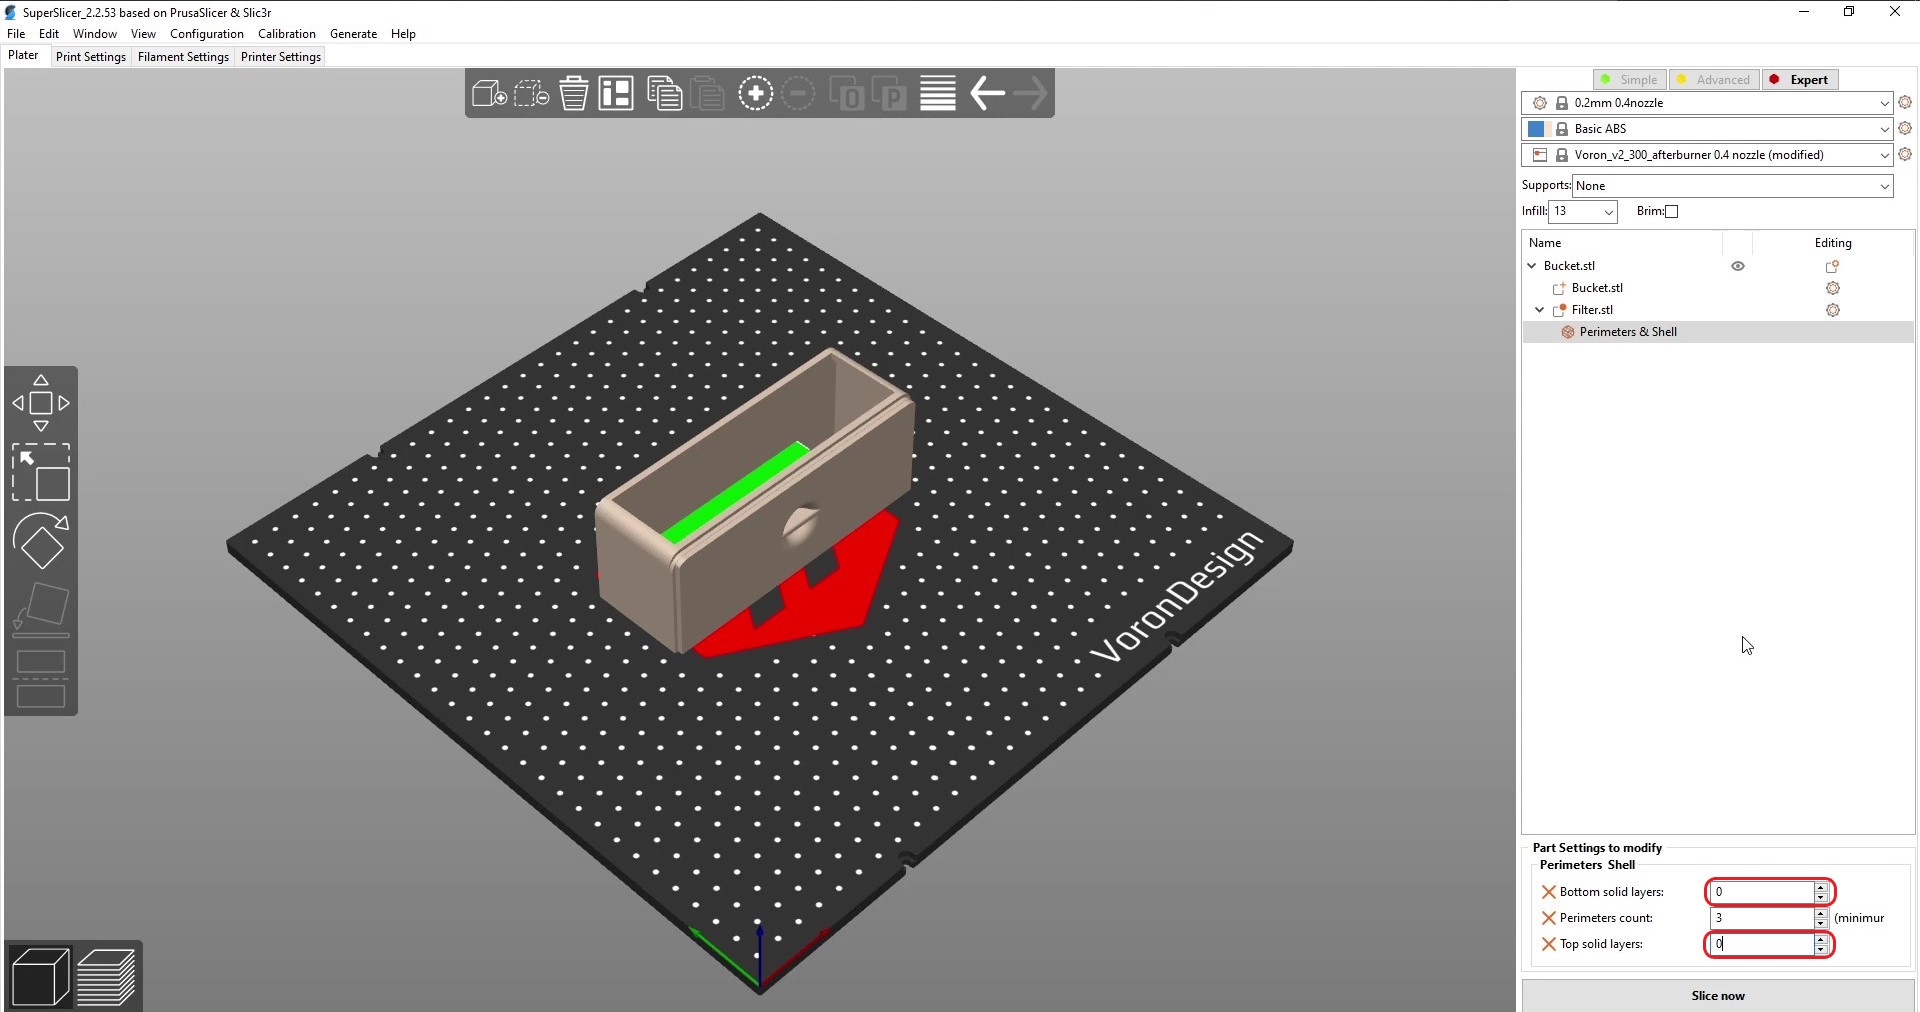
I have attached a few screenshots of how to prepare the print with the filter dummy file. The green options shown in the last two screenshots are optional. Either you set the infill of the whole bucket higher or you add another setting for the filter dummy. Except for the top end, the print consists of walls only. Make sure that the filter dummy and the bucket are centered. If you want to move them, then select both at the same time so you don't change the cropping area.
| 1: Select filter dummy as modifier | 2: Select settings for modifier |
|---|---|
 |  |
| 3: Select Perimeters Shell | 4: Set Top-/Bottom-Layer to 0 |
 |  |
| 5: Set infill density + Type to Grid | 6: (Optional) Set different infill density for modifier |
 | 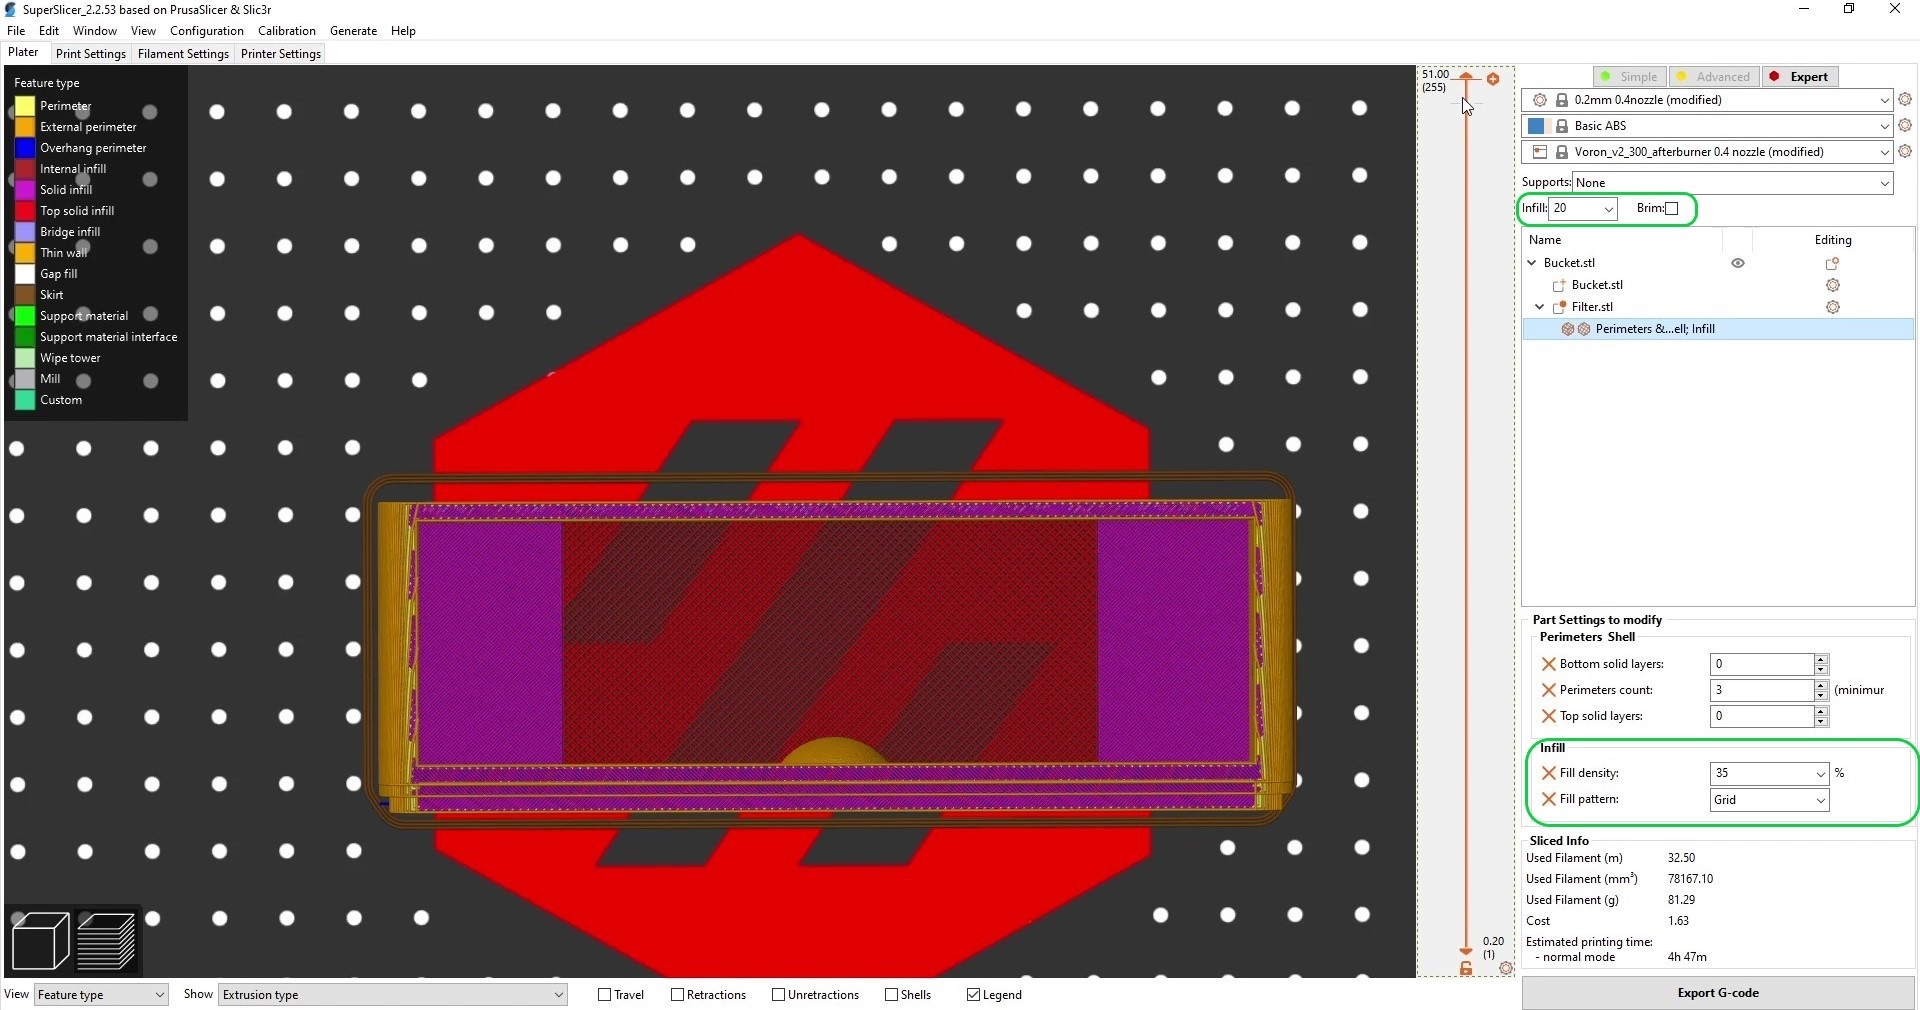 |
Just set the top and bottom layers of the bucket to 0, so the whole bottom of the insert becomes a mesh. (Please take a look at 'Why use the Infill?' for more information)
For both variants you should choose the infill density so that the coal particles can not fall out, but also not too high, so as not to close the airflow too much. Please test before printing. The settings given are for demonstration purposes only!
4x M3x25mm screws
2x M3x6mm BHCS
2x M3 Brass Heatset Inserts - Short M3x5x4
1x 40mmx80mm Hepa filter (https://www.aliexpress.com/item/1005001615722382.html)
~500g activated coal particles (>1mm)
You should use acid-free carbon, otherwise the metal parts will oxidize. Read more aout it here.
Idea by Deutherius.
Thanks to Jon for the name.
Thanks to Kevin Rahhal for the lid design.
Thanks to moogoo for the hint with the cover issue.
17.07.2022: New lid design for both version so there's no gap in the back. Also fixed the issue with the rear cover touching the bucket of the Trident/R2 version. 01.11.2021: A new coal container with lid to avoid mess when moving the printer. The printing instructions are still the same as before. 26.04.2022: Added a version for Trident/ V2.4r2. I optimized the existing files as well (walls without infill, chamfered bucket, straight top lid)
Discord: kevinakasam#2097