V2.4

MGN12 X-axis

arkeet

Replaces the dual MGN9H rails with a single MGN12H.
    CAD
      V2.4_MGN12.step
    Images
      carriage.png
      carriage_assembly.png
      carriage_mounting.png
      photo.jpg
      x_axis.png
    STLs
      probe_retainer_bracket_9mm.stl
      x_carriage_frame_left.stl
      x_carriage_frame_right.stl
      x_carriage_frame_right_endstop.stl
      xy_joint_left_lower.stl
      xy_joint_left_upper.stl
      xy_joint_right_lower.stl
      xy_joint_right_upper.stl
    .metadata.yml
    README.md

Select a file to view it.

MGN12 X axis

Note: Voron Trident officially uses a slightly improved version of this mod. It is suggested to use the X axis parts from Trident instead. https://github.com/VoronDesign/Voron-Trident/tree/main/STLs/Gantry/X_Axis


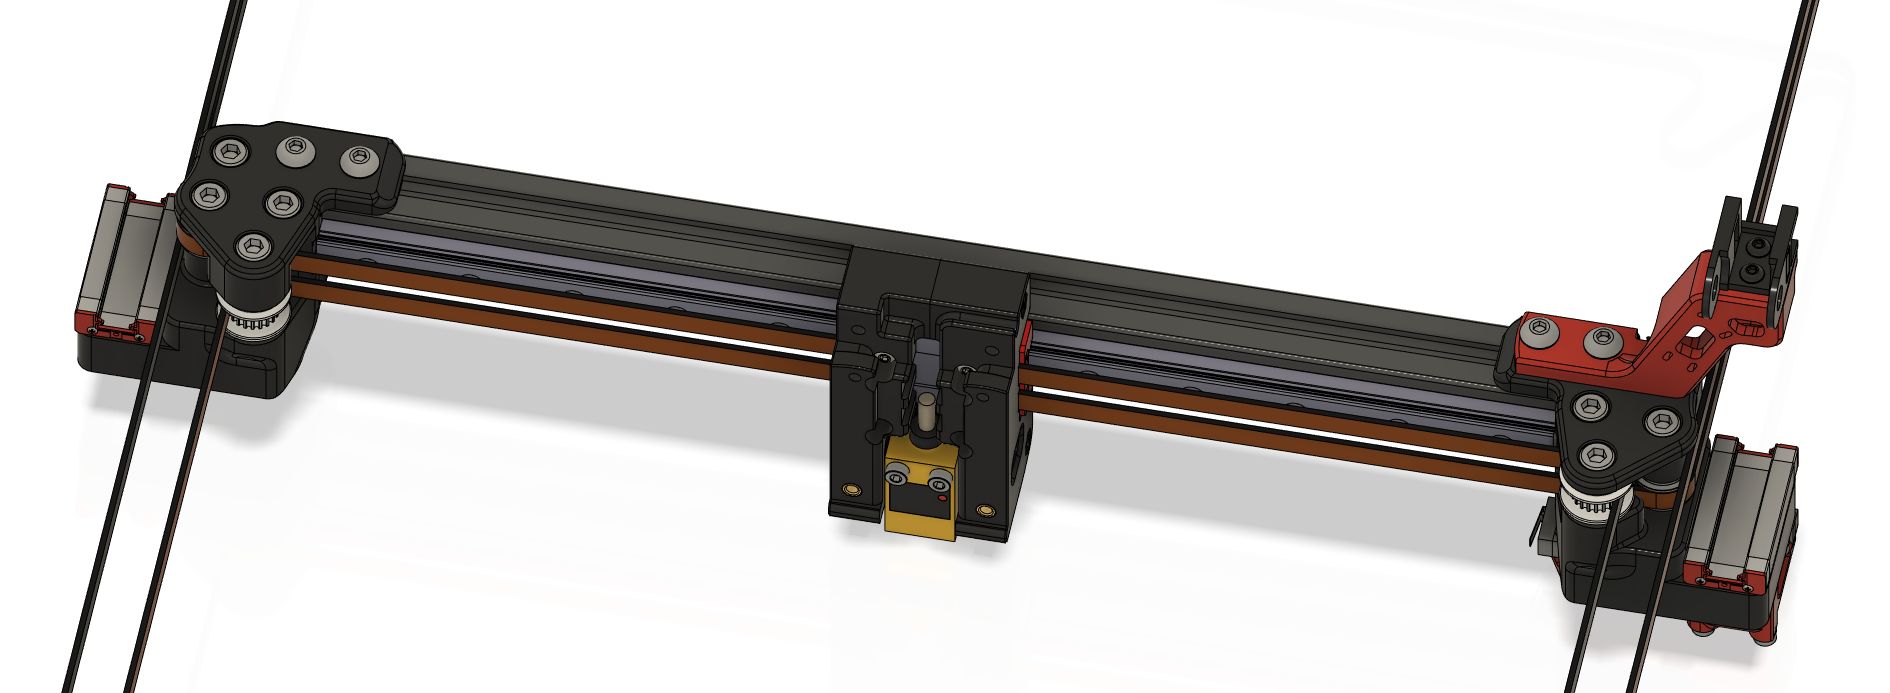
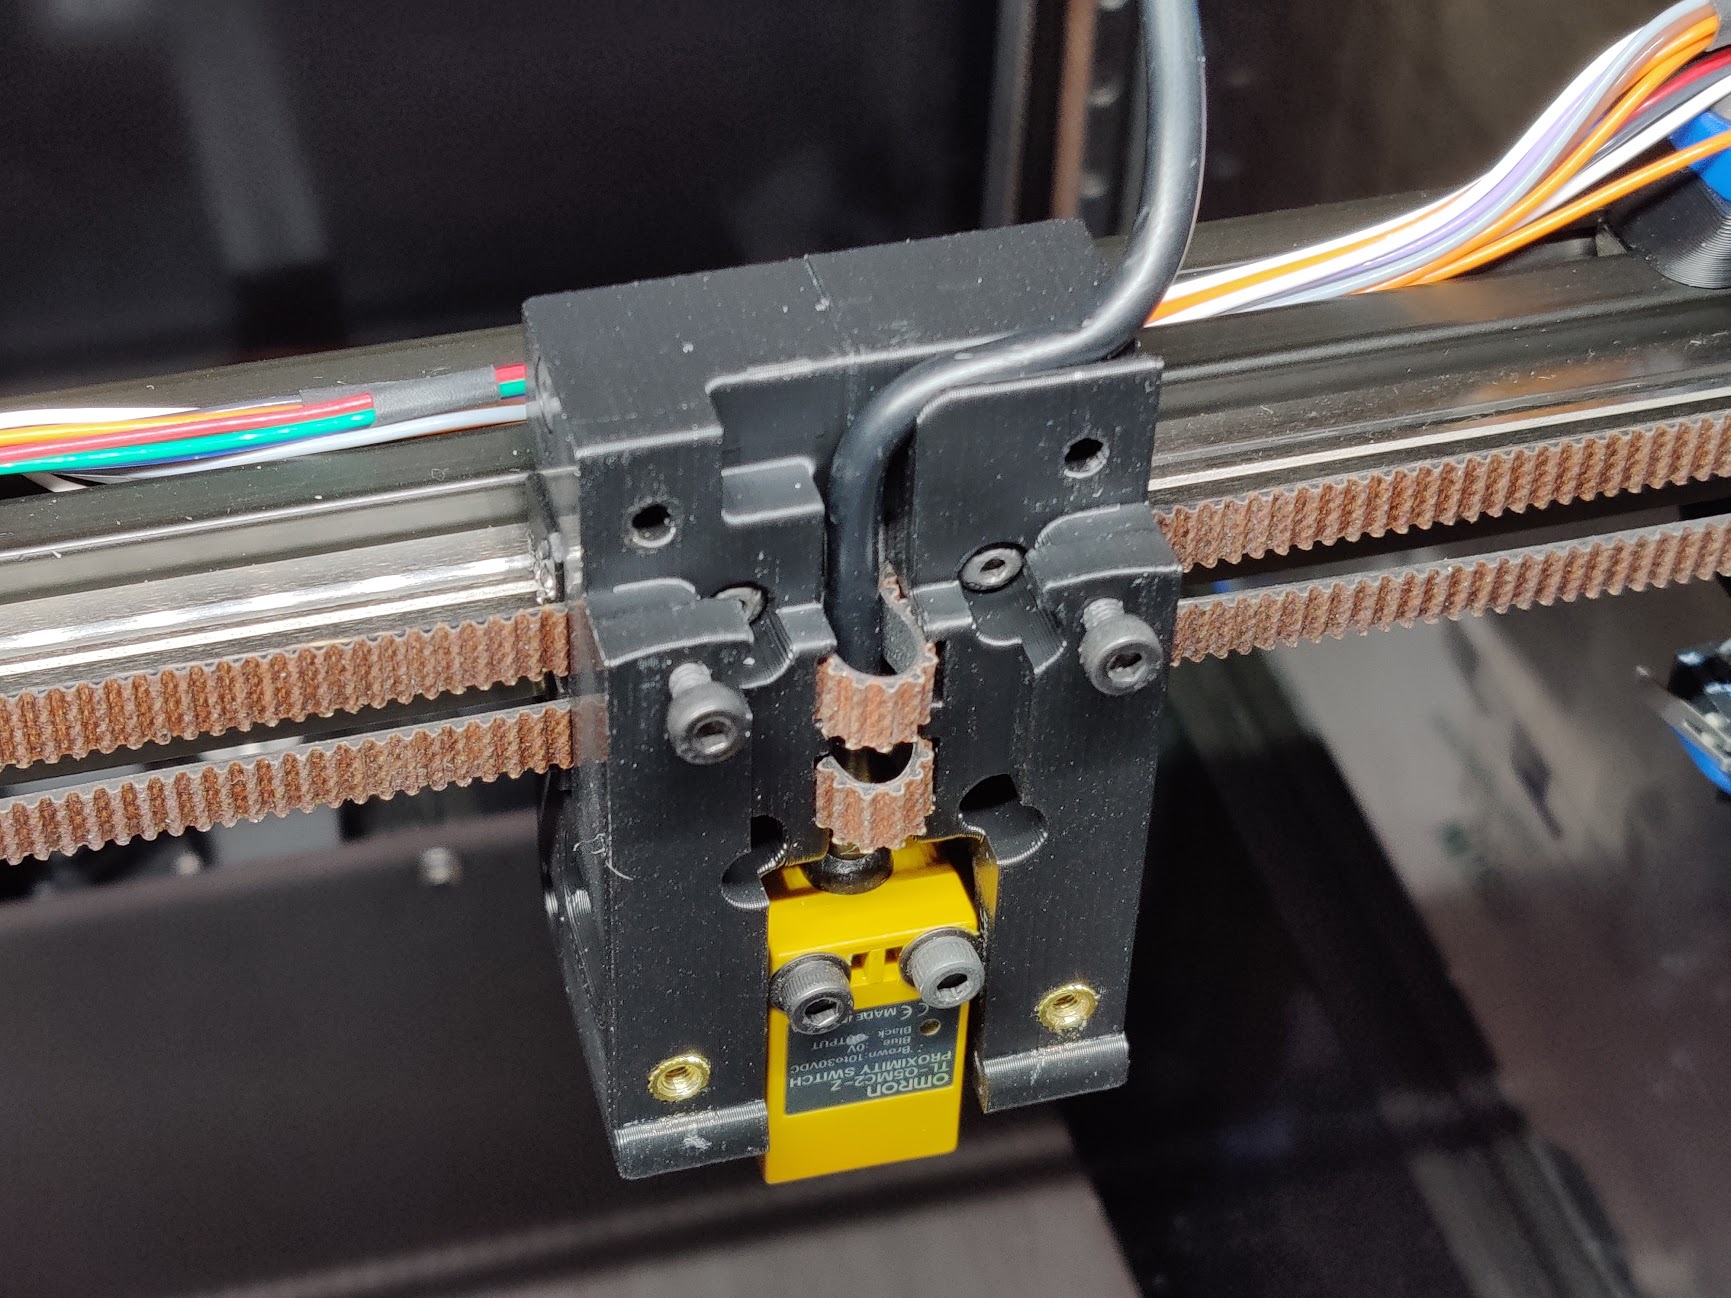
This replaces the dual MGN9H rails on the V2.4 X axis with a single MGN12H rail. The belt is directly clamped to the MGN12 block by the carriage.

The stock PL-08N probe might be too long to fit. Recommended alternatives are listed below.

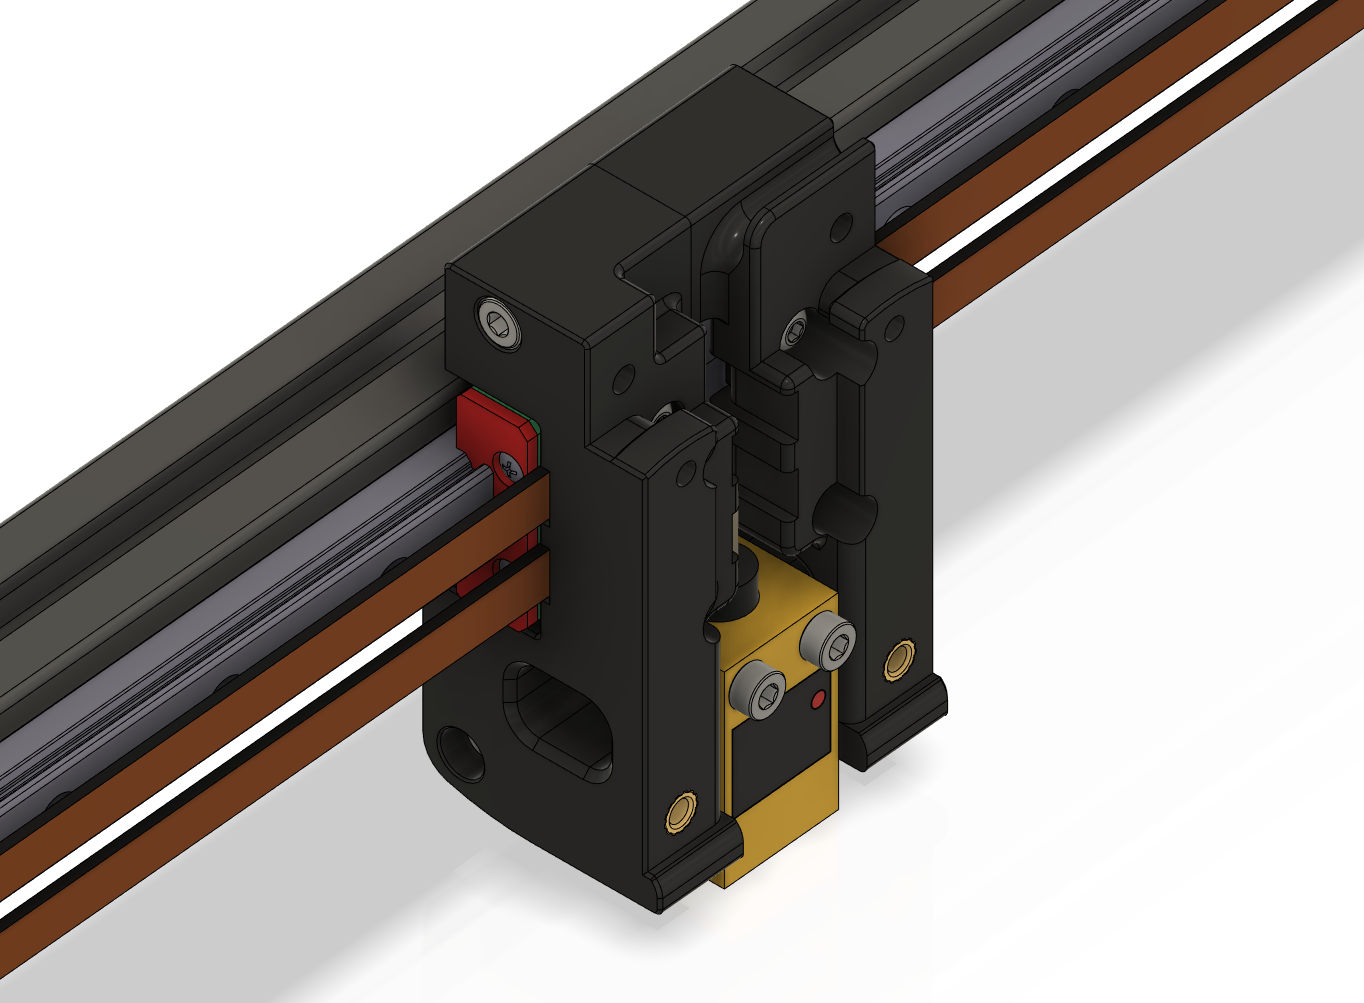
As an option, the x_carriage_frame_right_endstop.stl allows mounting the X endstop switch on the carriage, which is useful on an umbilical cable setup.

Thanks to joshmurrah, hartk, and everyone else who helped out in one way or another.

Required hardware

In addition to things you can reuse from the stock build, these items are required:

  • 1x MGN12 linear rail with MGN12H carriage (same length as the original MGN9 rails)
  • 1x M3x40 SHCS
  • 4x M3x8 BHCS (or 2x BHCS and 2x SHCS)

Recommended probes:

  • Omron TL-Q5MC2 (use M3x25 or M3x30 screws)
  • Panasonic GL-18HB/18HLB (use M3x25 or M3x30 screws)
  • Panasonic GX-H15B/HL15B (use the 9mm probe bracket, and M3x16 or M3x20 screws)

Instructions

Assembly is similar to stock V2.4, see the assembly images below.

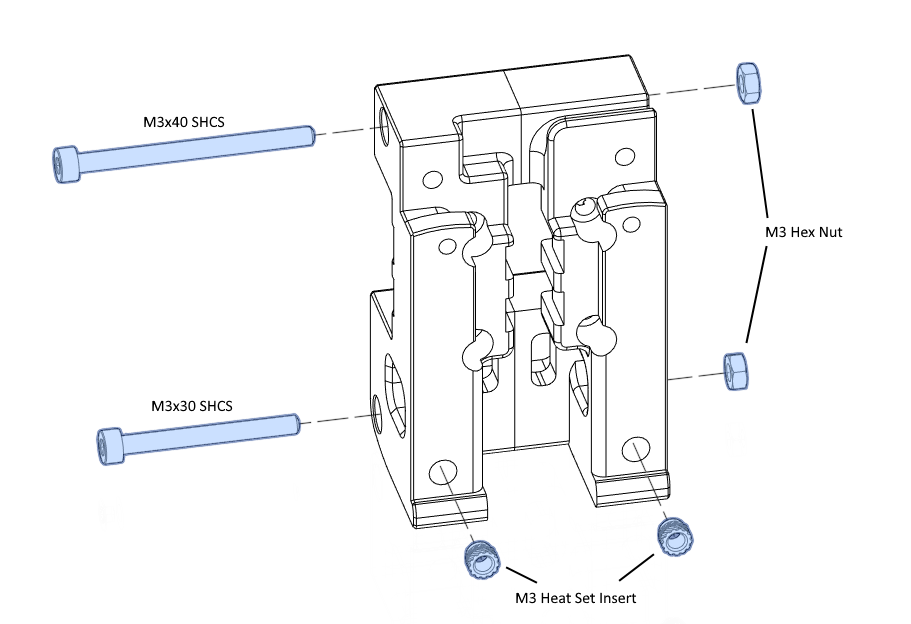
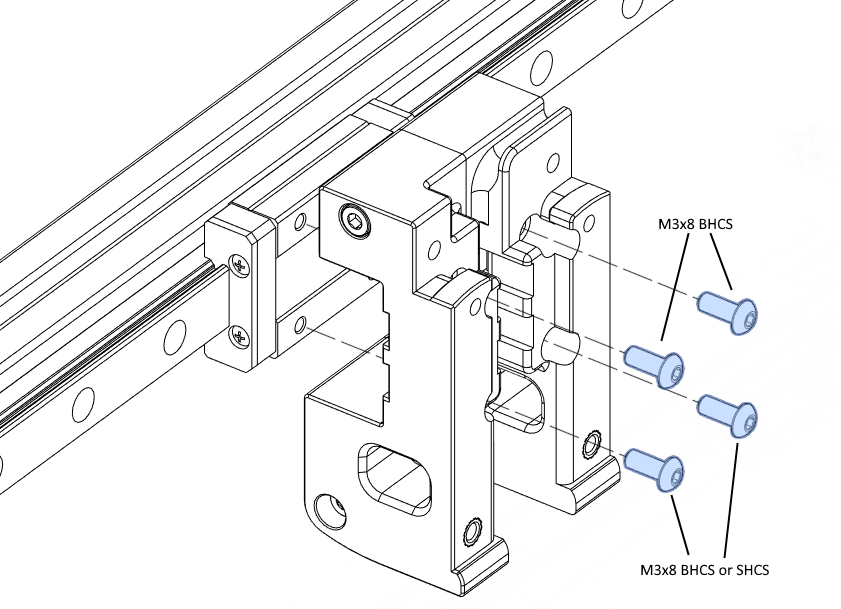
The belts are clamped between the carriage and the MGN12H block. This procedure worked for me:

  1. Loosely fasten the carriage to the MGN12H block using the M3x8 screws.
  2. Push the belts in on the left side, until they are just visible in the middle. Tighten the screws on the left side a little bit, to secure the belt ends.
  3. Push the belts in on the right side as far as you can, and pull them out through the middle.
  4. Tighten all screws, while making sure that all belts are firmly held in the clamp teeth.
  5. You may wrap the extra length of belt around the probe cable, as in the photo below.

Please check the Z endstop position after assembly as it may have changed slightly.

Images

X-axis rendered

Carriage rendered

Carriage assembly

Carriage mounting

Photo

Changelog

2021-07-26

  • Fixed magnet position for Hall effect endstop. Both halves need to be reprinted.

2021-03-28

  • Added option for mounting X endstop on the carriage.
  • Updated readme to note that stock PL-08N probes might fit.

2021-03-21

  • Initial release
Other mods by arkeet
© 2024Voron Design.All rights reserved.